

Jun 27th 2022 - Monica Cunanan
How to Properly Disassemble a Robot Coupe R2 — Parts, assembly, and more
When it comes to any type of food preparation, a food processor is a crucial commercial food prep equipment in any commercial kitchen. That’s one reason why many restaurants rely on the Robot Coupe R2 to prepare delicious food. This commercial food processor can easily slice, shred, and chop any ingredient and food material. Along with proper maintenance and care, proper disassembly is important when cleaning the food processor.
Here are the instructions on how to properly disassemble a Robot Coupe Processor:
How to Properly dismantle a Robot Coupe 2

- Step 1: Remove the Bowl Attachment
- Step 2: Remove the Continuous Feed Attachment
- Step 3: Remove the Vegetable Prep Attachment
Pro-tip: Make sure to always consult the commercial food processor manual for more detailed processes.
Step 1: Remove the Bowl Attachment
Here are the steps for dismantling a bowl attachment properly:

- Turn off the machine: Start by shutting down the machine and unplugging it from the wall outlet. Start by turning off the machine and unplugging the power cord from the wall outlet.
- Remove the bowl lid by turning it to the left until the tabs unlock from the bowl. Once the lid is lifted, remove it.
- Remove any blade such as slicer blades if applicable. Rotate the blade until it becomes loose. After that, lift it off the shaft.
- Make sure the motor base faces you when removing the bowl. Turn the bowl counterclockwise to lock it. Next, turn the bowl to its right as you lift it from the base.
Step 2: Remove the Continuous Feed Attachment
If the continuous feed connection is connected to the R1 processor, here is how you can remove it properly.

- Turn off the machine – Start by turning off the machine, then unplug the power cord from the wall outlet. Start by turning off the machine and unplugging the power cord from the wall outlet.
- Remove the pushers from the continuous feed lead. They should be removed before the lead is sent into the printer.
- Remove the continuous feed lead by turning the motor base slightly clockwise and then slightly counterclockwise to loosen it. After that, remove the ramp from the continuous feeder attachment by lifting it up.
- Remove the cutting and discharging plates – rotate the cutting disc until it’s loose, then lift it up. This will allow you to access the discharge plate. Similar to the cutting discs, slightly rotate the discharge plates to loosen them. Next, lift up to remove.
- To remove the continuous feed attachment, turn it counterclockwise until it unlocks. Next, turn the bowl slightly clockwise as you gently lift the bowl off the motor base.
Step 3: Remove the Vegetable Prep Attachment
If the vegetable prep attachments are connected to the R2 processors, here are the proper disassembly instructions.

- Turn off the machine – First turn off the machine and then unplug the power cord from the outlet.
- Remove the discharge plate - Rotate the discharge plate to help loosen it off the motor shaft. Next, lift the plate off of the shaft.
- Remove the vegetable prep attachments – Turn the attachment slightly to the left to unlock it from the motor base. Lift the attachment from the base.
How to Assemble a Robot Coupe R2 Properly
R2 Ultra Continuous-Feed Assembly Instructions
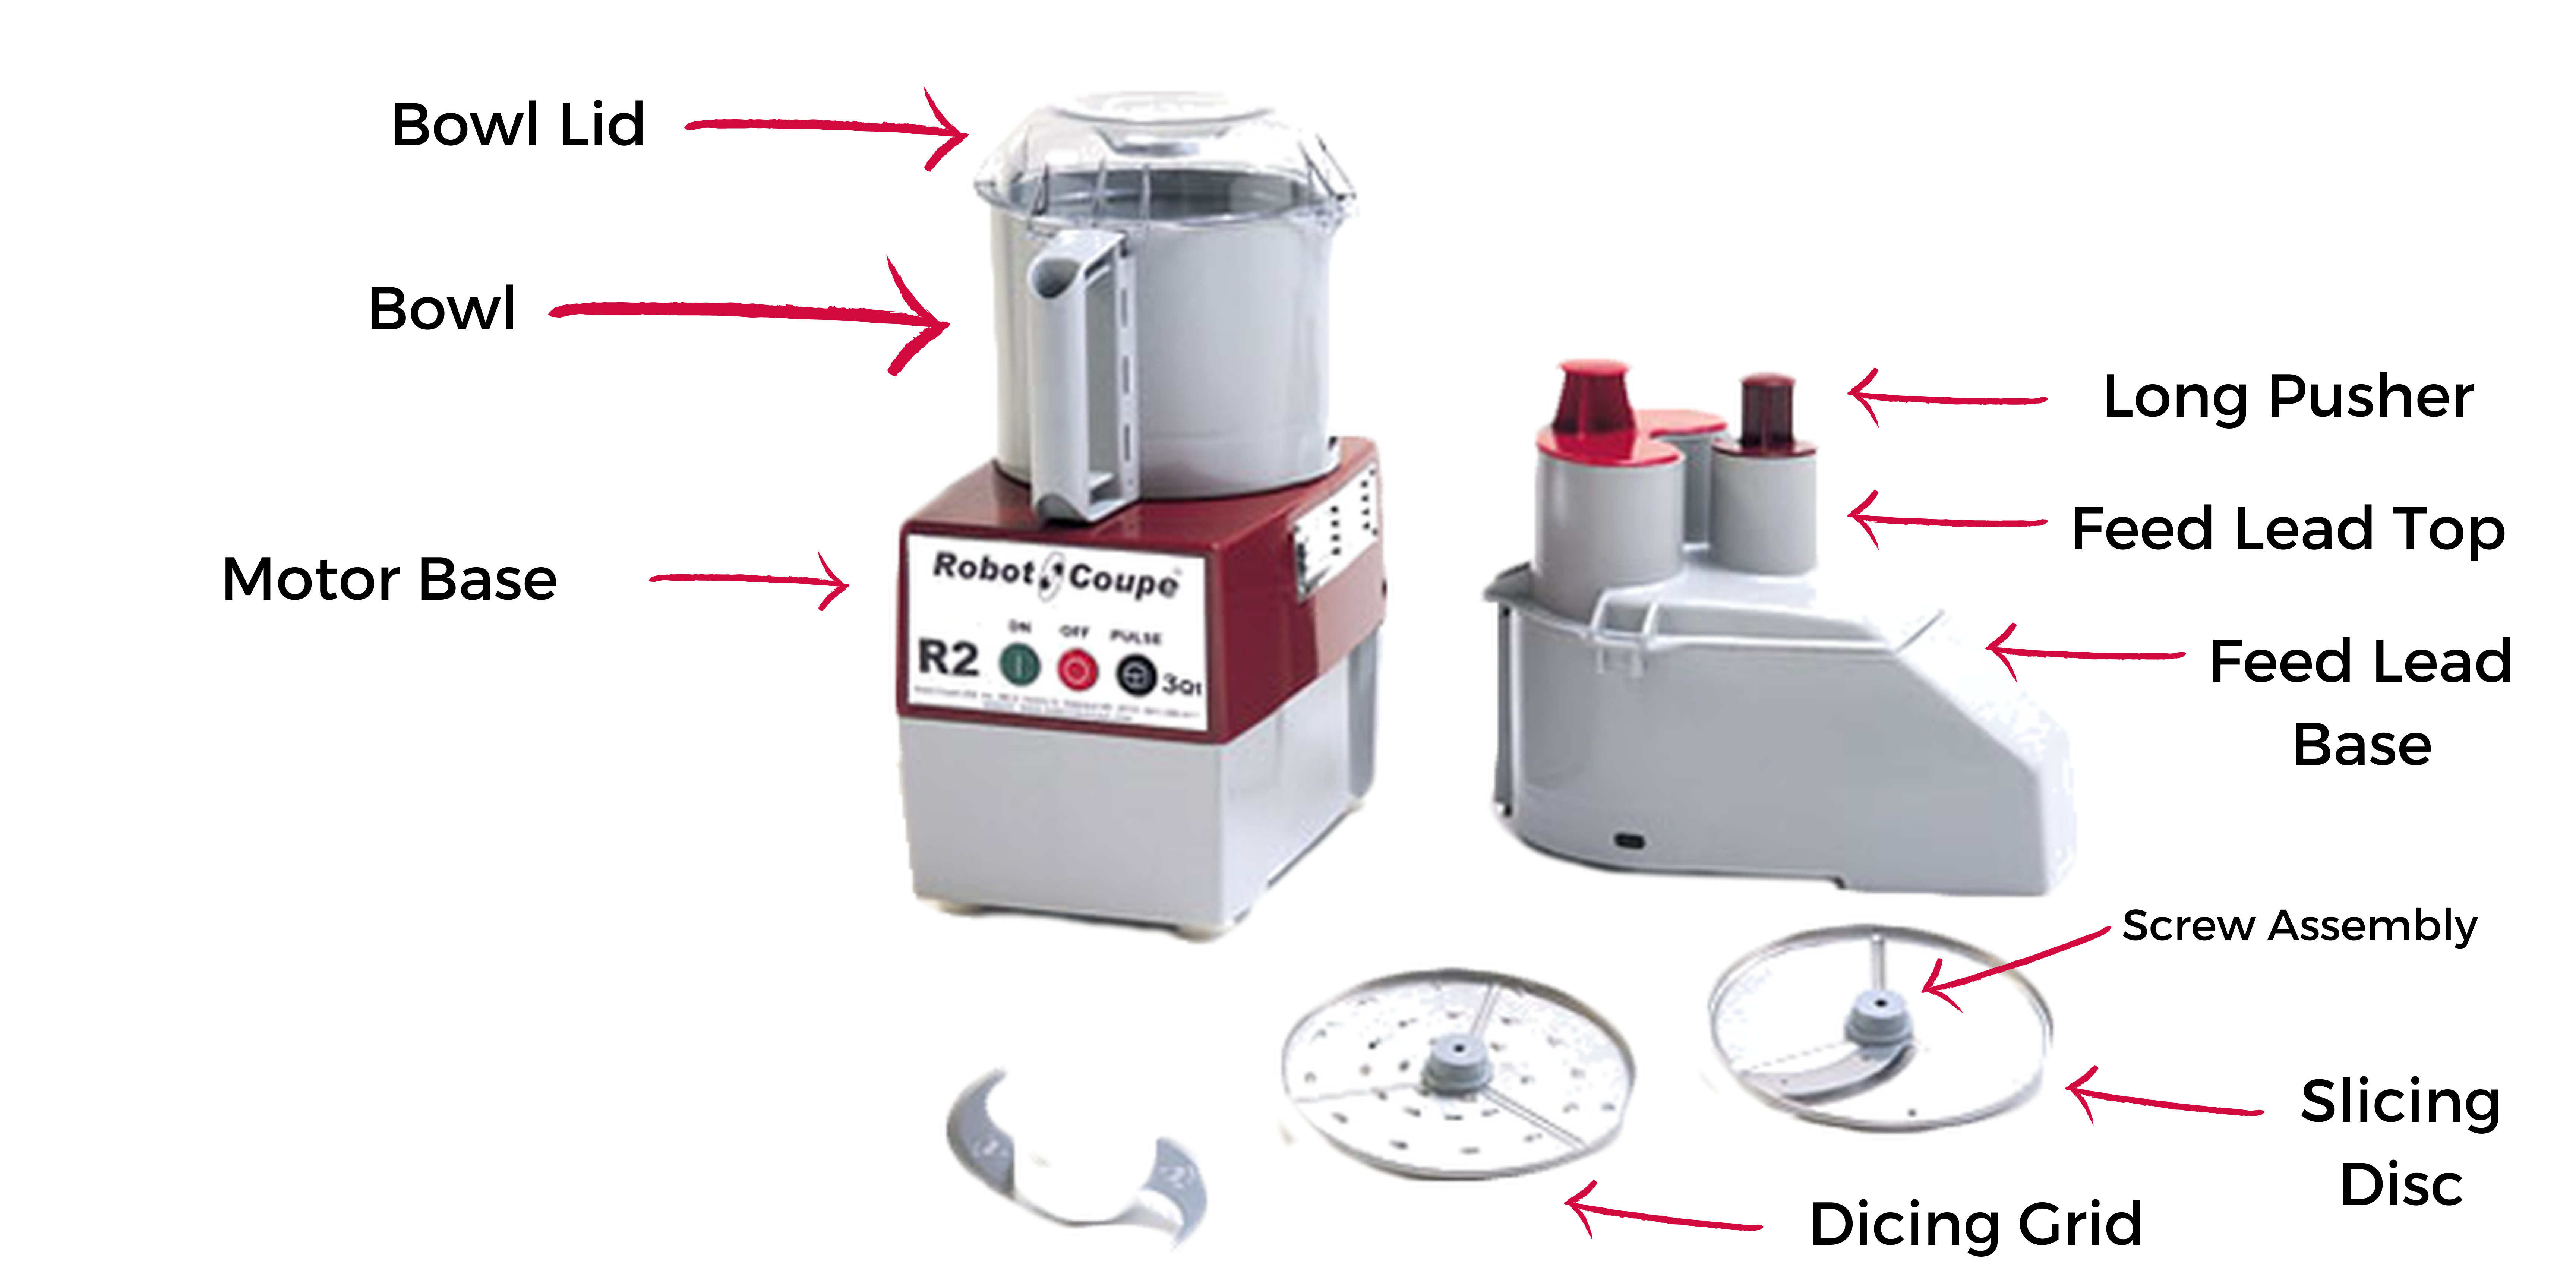
Follow the Diagram for Robot Coupe

- Step 1: Place Feed Lead Base slightly off-center (left) and turn right
- Step 2: Place Discharge Plate on Motor Shaft
- Step 3: Turn the Discharge Plate until it drops.
- Step 4: Place the Dicing Grid with the tab facing rear of the machine.
- Step 5: Make sure that Slicing Disc is installed over Dicing Grid
- Step 6: The Screw or motor bolts Assembly should be tightened by Turning Clockwise until snug enough but not locked into place
- Step 7: Place Top of Continuous Feed while making sure that the tabs are inside the feed lead base slightly left of center and turn right locking it in place
- Step 8: Make sure that the Long Pusher is in the round slot of the Pusher Assembly
- Step 9: Place Pusher Assembly into half-moon slot of Top half of Feed Lead.
- Step 10: Make sure to assemble R2Dice with Continuous Feed Attachment before starting the unit
Check this out for more detailed insights: R2Dice Specifications
R2 Bowl Assembly Instructions:

- Step 1: Place the bowl over the motor shaft positioned with the handle slightly off-centered (to the left).
- Step 2: Make sure to rotate the bowl counterclockwise until the handle is centered in front.
- Step 3: Place “S” Blade on the motor shaft inside the bowl and spin counterclockwise until you hear it lock in place
- Step 4: Place Bowl lid on with largest tab on Bowl slightly off-centered (to the left)
- Step 5: Slightly twist in counterclockwise until the tab slides into the safety lock position. Now the unit can be started.
Getting Robot Coupe Machines?
Thinking of purchasing any Robot Coupe Food Processor for your business professional kitchen? Here at Culinary Depot, we carry a wide range of Robot Coupe Food Processors and products that will be suitable for your business.
Contact us or visit our online store for more information.